Difference between revisions of "iMX6 Rex Connecting the Components and Cables"
Jump to navigation
Jump to search
| Line 3: | Line 3: | ||
This page is intended to show the necessary connections and steps to successfully boot and operate the development kit. | This page is intended to show the necessary connections and steps to successfully boot and operate the development kit. | ||
== Connecting the board == | == Connecting the board == | ||
| − | Prepare iMX6 Base Board and plug in (bootable) microSD card, serial cable, Ethernet cable, HDMI cable and other devices or interfaces you need. Plug the power supply connector in. | + | Prepare iMX6 Base Board and plug in (bootable) microSD card, serial cable, Ethernet cable, HDMI cable and other devices or interfaces you need. Plug the power supply connector in. <br /> |
| − | [[image: | + | [[image:iMX6_Rex_Development_Kit-Connections.jpg|600px]] |
=== Default booting selection === | === Default booting selection === | ||
To boot from SPI Flash, make sure that BOOT_MODE jumper is not present:<br /> | To boot from SPI Flash, make sure that BOOT_MODE jumper is not present:<br /> | ||
Latest revision as of 22:02, 26 October 2021
This page is intended to show the necessary connections and steps to successfully boot and operate the development kit.
Connecting the board
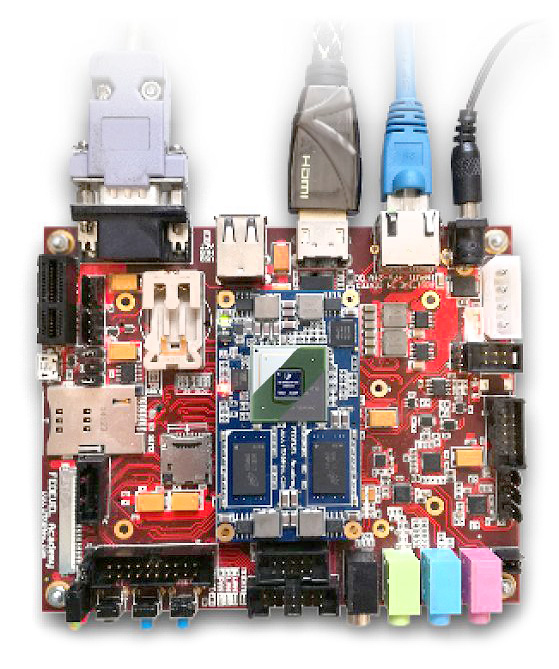
Prepare iMX6 Base Board and plug in (bootable) microSD card, serial cable, Ethernet cable, HDMI cable and other devices or interfaces you need. Plug the power supply connector in.

Default booting selection
To boot from SPI Flash, make sure that BOOT_MODE jumper is not present:

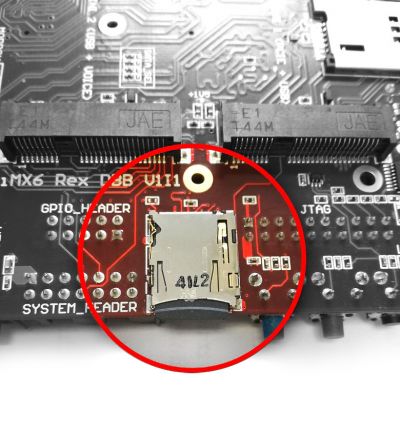
For loading filesystem, micro SD card needs to be plugged into the bottom slot J29:
