Difference between revisions of "i.MX51 SODIMM PC Controlling the Development Kit"
| Line 26: | Line 26: | ||
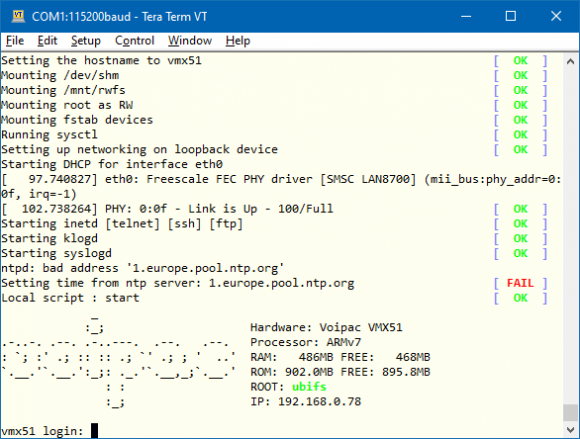
Controlling the development kit using TeraTerm:<br /> | Controlling the development kit using TeraTerm:<br /> | ||
| − | [[image:i.MX51_SODIMM_PC-Development_Kit-Serial_console. | + | [[image:i.MX51_SODIMM_PC-Development_Kit-Serial_console.png|580px]] |
== Using External Monitor and USB Keyboard == | == Using External Monitor and USB Keyboard == | ||
| Line 41: | Line 41: | ||
<br /><br /> | <br /><br /> | ||
Controlling the development kit using external monitor and USB keyboard:<br /> | Controlling the development kit using external monitor and USB keyboard:<br /> | ||
| − | [[image:i.MX25_SODIMM_Base_Board-Video_output. | + | [[image:i.MX25_SODIMM_Base_Board-Video_output.png|580px]] |
== Controlling the Development Kit over Ethernet == | == Controlling the Development Kit over Ethernet == | ||
| Line 62: | Line 62: | ||
<br /> | <br /> | ||
Controlling the development kit using PUTTY SSH client:<br /> | Controlling the development kit using PUTTY SSH client:<br /> | ||
| − | [[image:i.MX25_SODIMM_Base_Board-SSH_Connection. | + | [[image:i.MX25_SODIMM_Base_Board-SSH_Connection.png|580px]] |
<br /><br /> | <br /><br /> | ||
Controlling the development kit using WinSCP (Explorer Interface):<br /> | Controlling the development kit using WinSCP (Explorer Interface):<br /> | ||
| − | [[image:i.MX25_SODIMM_Base_Board-FTP_Connection. | + | [[image:i.MX25_SODIMM_Base_Board-FTP_Connection.png|580px]] |
Revision as of 19:33, 31 August 2021
This page guides though the first steps of controlling and operating the development kit. To prepare the working setup connect and plug in cables first.
The development kit is supplied with preinstalled bootloader, Linux kernel and demo filesystem. Several ways of controlling boards are available:
Controlling the Development Kit over Serial Line
Recommended HW:
- PC with serial port or USB to serial adapter
- Voipac i.MX51 SODIMM PC - Development kit
- Voipac serial cable
Recommended SW:
- Serial line terminal (PUTTY, Minicom, Ckermit, Hyperterminal, TeraTerm, ...)
Default serial port settings:
- Speed (baud): 115200
- Data bits: 8
- Stop bits: 1
- Parity: None
- Flow control: None
Controlling the development kit using TeraTerm:

Using External Monitor and USB Keyboard
Recommended HW:
- Voipac i.MX51 SODIMM PC - Development kit
- multiple video devices are supported:
- external monitor with DVI or VGA connector (DVI to VGA adapter is required in case of VGA monitor usage)
- TFT Display Data Image display
- TFT Display Optrex display
- TFT Display EDT display
- USB keyboard
Important: External monitor must support at least one of the following resolutions: 640x480px, 800x480px, 800x600px, 1024x720px or 1280x800px.
Controlling the development kit using external monitor and USB keyboard:

Controlling the Development Kit over Ethernet
Recommended HW:
- PC with Ethernet
- Voipac i.MX51 SODIMM PC - Development kit
- Ethernet cable
Recommended SW:
- Telnet client (Telnet, PUTTY, …)
- SSH client (SSH,PUTTY, …)
- FTP client (FTP, Filezilla, BareFTP, …)
- SFTP client (Filezilla, PUTTY, WinSCP, …)
Important notes:
- Modules are shipped with empty root password
- IP address is dynamic by default and setup by the DHCP server upon boot
- SSH, SFTP services require root password to be set up (using passwd command)
- FTP, SFTP are recommended only for data transfer (binary mode selection is advised)
Controlling the development kit using PUTTY SSH client:

Controlling the development kit using WinSCP (Explorer Interface):
