Difference between revisions of "iMX6 Rex USB Booting"
Jump to navigation
Jump to search
(Created page with "Category:iMX6 Rex Development kit Category:iMX6 Rex Recovery <!-- --> These steps guides through loading a bootloader via USB OTG interface. This can be useful during...") |
|||
| (7 intermediate revisions by the same user not shown) | |||
| Line 1: | Line 1: | ||
| − | [[Category:iMX6 Rex Development | + | [[Category:iMX6 Rex Development Kit]] |
[[Category:iMX6 Rex Recovery]] | [[Category:iMX6 Rex Recovery]] | ||
<!-- --> | <!-- --> | ||
| − | These steps | + | These steps guide through loading a bootloader via USB OTG interface. This can be useful during recovery or bootloader update. |
''''' Recommended HW: ''''' | ''''' Recommended HW: ''''' | ||
| Line 9: | Line 9: | ||
* Voipac iMX6 Rex Development Kit | * Voipac iMX6 Rex Development Kit | ||
* USB to Micro-USB cable | * USB to Micro-USB cable | ||
| − | * | + | * Soldering station |
''''' Recommended SW: ''''' | ''''' Recommended SW: ''''' | ||
| − | * [http://downloads.voipac.com/ | + | * [http://downloads.voipac.com/files/iMX6_Rex_Development_Kit/tools/mfgtools-Imx6Rex.zip MfgTool] feature |
* Serial line terminal | * Serial line terminal | ||
== Procedure == | == Procedure == | ||
| − | Resolder resistors R0 on position R63 to R62 and R67 to R65 on the base board (Near battery holder J32): | + | Resolder resistors R0 on position R63 to R62 and R67 to R65 on the base board (Near battery holder J32):<br /> |
| − | [[image: | + | [[image:iMX6_Rex_Development_Kit-USB_OTG_selection.jpg|450px]]<br /><br /> |
| − | Short BOOT_MODE jumper JP2 on iMX6 Rex Base Board. Connect PC and USB OTG port with a USB cable and power on the base | + | Short BOOT_MODE jumper JP2 on iMX6 Rex Base Board. Connect PC and USB OTG port with a USB cable and power on the base board:<br /> |
| − | + | [[image:iMX6_Rex_Development_Kit-USB_OTG_jumper.jpg|300px]]<br /><br /> | |
| − | |||
| − | |||
| − | |||
| − | |||
| − | |||
| − | |||
| − | |||
| − | [[image: | ||
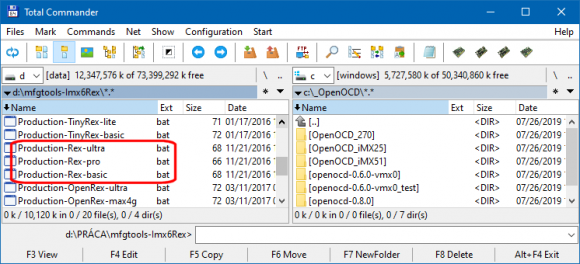
Open an appropriate BAT file:<br /> | Open an appropriate BAT file:<br /> | ||
| − | [[image: | + | [[image:iMX6_Rex_Development_Kit-Boot_file_selection.png|580px]]<br /><br /> |
Execute Manufacturing toolkit at host PC:<br /> | Execute Manufacturing toolkit at host PC:<br /> | ||
| − | [[image: | + | [[image:iMX6_Rex_Development_Kit-MfgTool_start.png|580px]]<br /><br /> |
Press Start button (CPU will boot firmware loaded over USB):<br /> | Press Start button (CPU will boot firmware loaded over USB):<br /> | ||
| − | [[image: | + | [[image:iMX6_Rex_Development_Kit-MfgTool_progress.png|430px]]<br /><br /> |
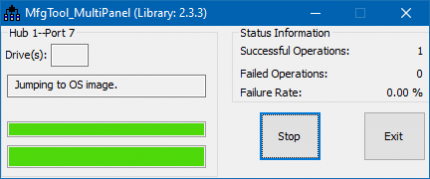
Wait until firmware transfer is finished:<br /> | Wait until firmware transfer is finished:<br /> | ||
| − | [[image: | + | [[image:iMX6_Rex_Development_Kit-MfgTool_finished.png|430px]]<br /><br /> |
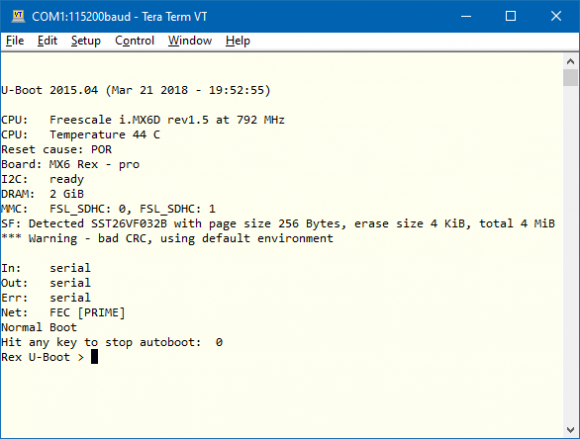
The board boots using the firmware loaded over USB:<br /> | The board boots using the firmware loaded over USB:<br /> | ||
| − | [[image: | + | [[image:iMX6_Rex_Development_Kit-Serial_output.png|580px]] |
Latest revision as of 22:31, 26 October 2021
These steps guide through loading a bootloader via USB OTG interface. This can be useful during recovery or bootloader update.
Recommended HW:
- PC with USB port
- Voipac iMX6 Rex Development Kit
- USB to Micro-USB cable
- Soldering station
Recommended SW:
- MfgTool feature
- Serial line terminal
Procedure
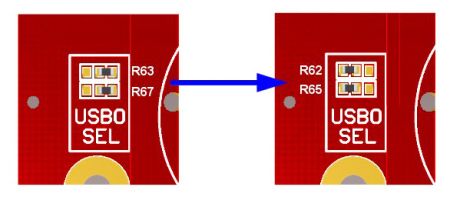
Resolder resistors R0 on position R63 to R62 and R67 to R65 on the base board (Near battery holder J32):
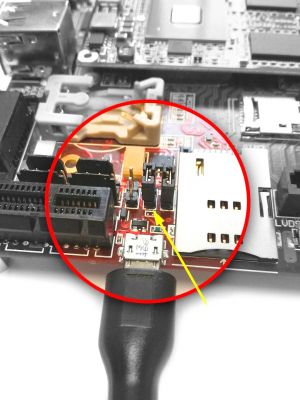
Short BOOT_MODE jumper JP2 on iMX6 Rex Base Board. Connect PC and USB OTG port with a USB cable and power on the base board:
Execute Manufacturing toolkit at host PC:
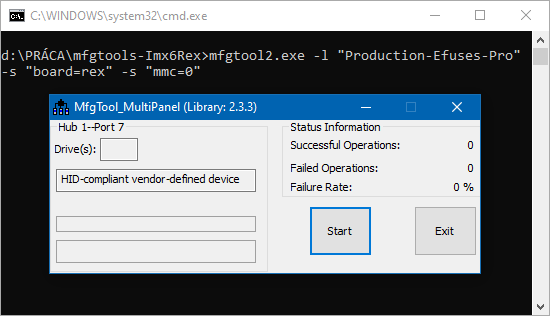
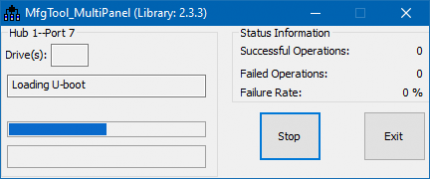
Press Start button (CPU will boot firmware loaded over USB):
